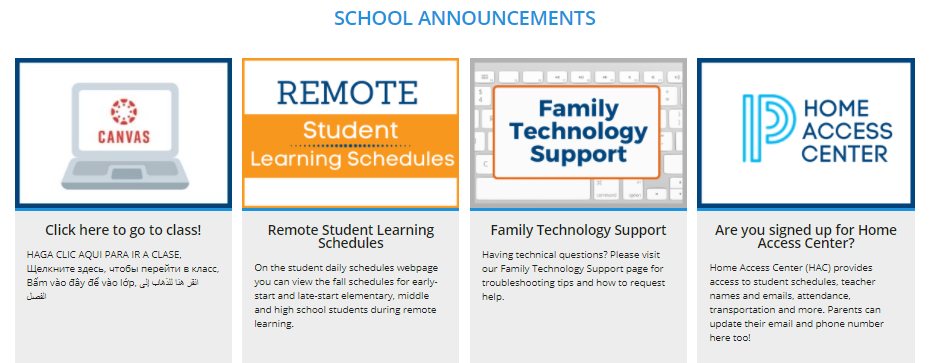
School Announcements App
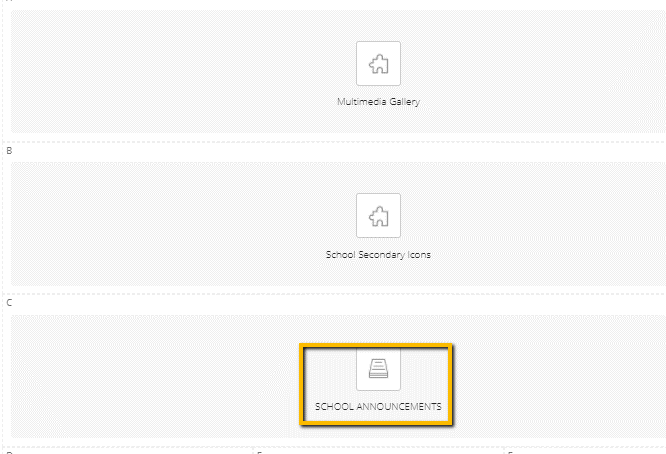
The images just below the Multimedia Gallery are school announcements.
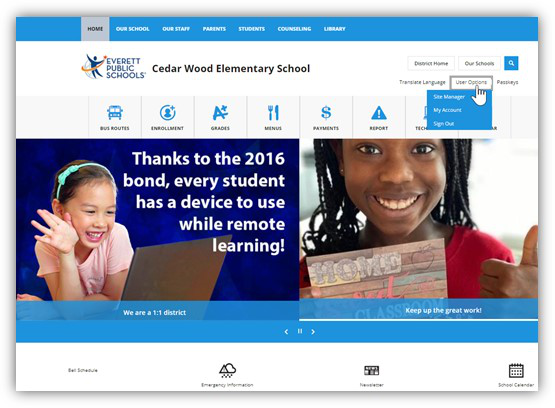
Log in, select Site Manager, and open your Homepage.
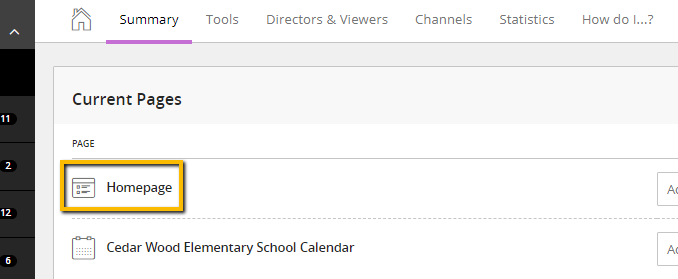
Click in the third section, SCHOOL ANNOUNCEMENTS click on ‘gray pencil’ to view current announcements and create a new announcement (the ‘green +’ will allow you to go directly to creating a new announcement, but we suggest using the gray pencil so you can review your current announcements and update as needed).
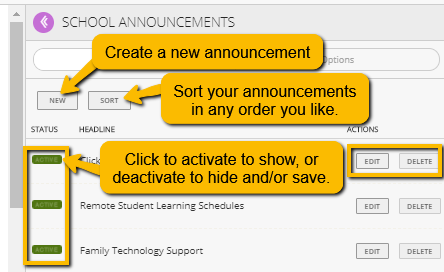
What am I seeing?
These are the announcements currently showing on the homepage. You may:
1. Create a ‘new’ announcement.
2. You can sort your announcements in any order you like.
3. You can click the green ‘active’ button to deactivate an announcement and hide or save.
4. You can edit the current announcement.
5. You can delete.
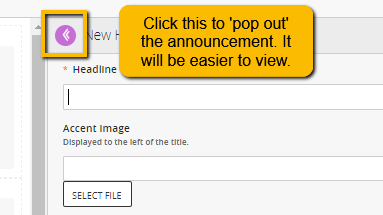
After opening the dialogue box, click on this purple button to ‘pop out’ the announcement for easier viewing.
Creating a new announcement – Announcement with link to ARTICLE
1. Select your image and crop to 198x286px (no exceptions) and have it ready to upload.
a. To crop: Go to Image Editor and Enter the pixel dimensions and set the sizing to 198x286px. Photoshop will crop your image to the correct size, smaller or bigger.
b. NOTE: If your announcement image has a white background, you will need to create a border to maintain consistency (e.g. these two images are the same size, but visually they do not look like it). Borders are easy to create, in PhotoShop . Click crop tool, set sizing to 198x286px, set background color to your choice and crop your image slightly larger, save to your computer. The sizing stays, but you will create a border.

Remember, entering Height and Width in the Image Upload Dialog Box does not automatically resize your image. You need to crop it to this size before you upload.

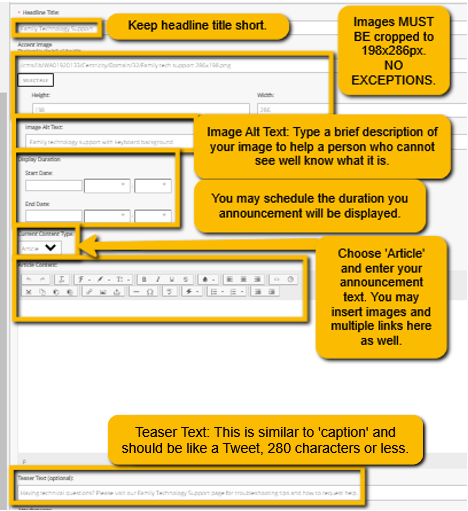
2. In the Open Dialog Box:
a. Enter a Title, keep it short.
b. Upload your image (make sure it is cropped and sized to 198x286px).
c. Describe the image and enter in Image Alt Text box.
d. Schedule your announcement for duration if you choose.
e. Enter your text into body of article. You may add images and multiple links here as well.
f. Enter ‘Teaser Text’ should be like a Tweet. 280 characters or less.
g. Click Save.
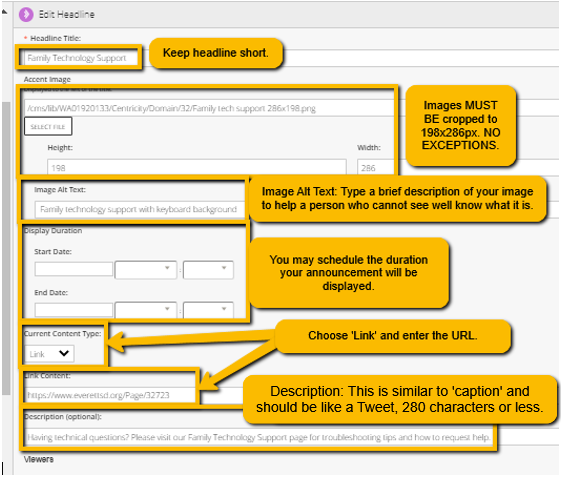
Creating a new announcement – Announcement with LINK to webpage
1. Select your image and crop to 198x286px (no exceptions) and have it ready to upload.
a. To crop: In Photoshop, open the desired image and click the crop tool (video also shows how to create a border). Enter the pixel dimensions and set the sizing to 198x286px. Photoshop will crop your image to the correct size. If your image looks to get cropped too small,
b. NOTE: If your announcement image has a white background, you will need to create a border to maintain consistency (e.g. these two images are the same size, but visually they do not look like it). Borders are easy to create, in PhotoShop . Click crop tool, set sizing to 198x286px, set background color to your choice and crop your image slightly larger, save to your computer. The sizing stays, but you will create a border.
Remember, entering Height and Width in the Image Upload Dialog Box does not automatically resize your image. You need to crop it to this size before you upload.
2. In the Open Dialog Box:
a. Enter a Title, keep it short.
b. Upload your image (make sure it is cropped and sized to 198x286px).
c. Describe the image and enter in Image Alt Text box.
d. Schedule your announcement for duration if you choose.
e. Enter your text into body of article. You may add images and multiple links here as well.
f. Enter ‘Teaser Text’ should be like a Tweet. 180 characters or less.
g. Click Save.