Photoshop – Resizing Images & Adding Borders
Images must be manually sized prior to uploading to the website.
Image sizes (width x height) – No exceptions
· Multimedia Gallery 1024x645px
· School Announcements 286x198px
If your photo just needs resizing:
Right click on your photo and select “Open with” then select Adobe Photoshop 2020
![]()
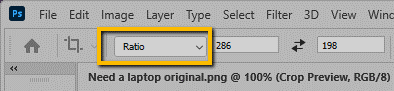
Navigate cursor to top left of the Photoshop window and click the drop-down arrow to select “Ratio.” Change the ratio to 286x198 for Announcements and 1024x645 for Multimedia gallery photos.
If your image is too large for the cropped area, drag the corners out to cover your whole image.
Select the “checkmark” to accept the changes
![]()
File, Save As, Save on your Computer (save the .jpg file) to your computer. *Tip* Save as with the dimensions in the filename FAQ286x198.jpg
Access the “ How to resize images and create borders in Photoshop ” video here.
If your photo needs a border AND resizing:
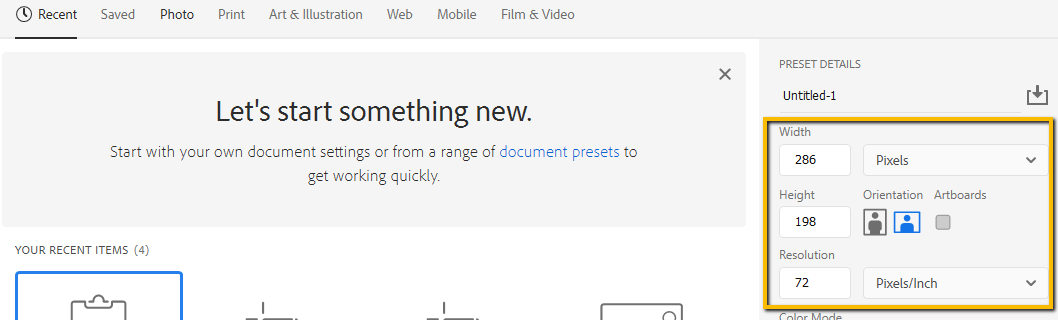
Open Photoshop and select “Create New.” Enter Width and Height (see below). Make sure in pixels.
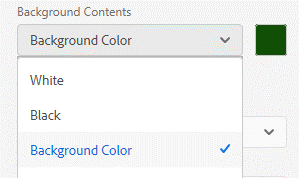
Under “Background Contents” you can default to black or enter a custom color here (this is when you need a border around your photo).
If your photo has lots of color that goes to the edge, you won’t need a border). If you want to use your school color , enter it in the “Custom” drop down under “Background Color”.
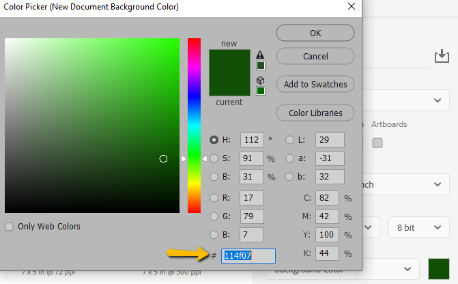
Click on the color swatch and enter your school color in the # window). Add to “swatches” so you will always have the color available in your color library. Next, click on “Create”
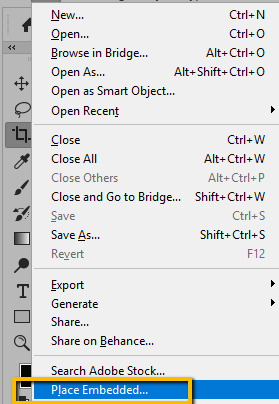
To load your photo to the workspace, click File, Place embedded. Select your photo and click “Place”
Grab the corners of the photo and resize to fit inside border. Select the Check mark to accept the change.
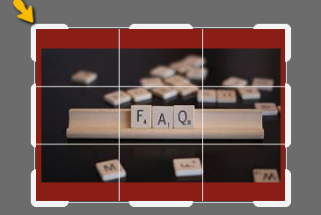
Drag the corners of the photo so the border shows around it.
![]()
File, Save As, Save on your Computer (save the .jpg file) to your computer.
*Tip* Save as with the dimensions in the filename FAQ286x198.jpg