
Bridges.com
To Create a Student Portfolio.
1. Go to www.bridges.com
2. C lick on the Create a new portfolio link
a. Step 1 of 2:
i. Enter your Site ID: XXXXXX
ii. Enter Site Password: XXXXXX
b. Step 2 of 2: Complete the form and click on the create your portfolio link
1. If your student created a portfolio earlier this year and they do not remember their user name and password, you may create a professional account, and this will give you access to all your student's user names and passwords. OR
2. You may have the students create a new portfolio. Then, from here on out, we will ask every student to use the same format:
Portfolio name: student's first initial last name EXAMPLE: bballbach
lower case
no space
if more than one student has same first initial/last name, just add month and date of birthday at end of name
EXAMPLE: bballbach910
Password: student i.d. #
IF every student follows the above format, they will ALWAYS know what their user name and password is.
The following two steps are for counselors or professionals ONLY
If a counselor already has a portfolio – Upgrade to a Professional Account
1. Go to: www.bridges.com
2. In the Student Sign In section, enter your portfolio name and password
3. Click on the Choices Explorer badge
4. In the upper right hand corner, click on the Professional Tools link
5. Under Reviewer, click on the Upgrade to a Professional Account link
6. Enter the Professional Account Access Key: XXXXXX and complete the form
7. Click on the Upgrade this portfolio to a professional account link
Creating A Professional Account
1. Go to: www.bridges.com
2. Under the Educator section, click on the Sign In link
3. Click on the create a new professional account link
4. I. Enter your Site ID: XXXXXX
ii. Enter Site Password: XXXXXX
iii. Enter Professional Account Access Key: XXXXXX and complete the form
5. Click on the Create a Professional Account link
1. Place the following link to the Functional Resume on your school’s web site:
http://docushare.everett.k12.wa.us/docushare/dsweb/Get/Document-10475/
Students will just have to click on this link to access the Functional Resume template.
2. Have the students re-name the document and “Save as” to the desktop. For example, they can name the document: “ Lucy Lee’s Functional Resume”, and save it to the desktop.
3. Students will download the template onto the desktop on which they are working.
4. Have students complete the Functional Resume.
5. Please have the students print a hard copy for the counselors as a back-up for any technology glitches.
6. Use the following directions (on the next page) for adding documents to individual portfolios in Bridges Choices Explorer.
7. After the students confirm that their Resume has been successfully uploaded into their portfolios and they have printed a hard copy, they can drag the Resume template and their personalized Resume from the desktop to the recycle bin.
www.bridges.com
Students Sign in with their Portfolio Name and Password
Enter Choices Explorer
Click on Your Portfolio Tab
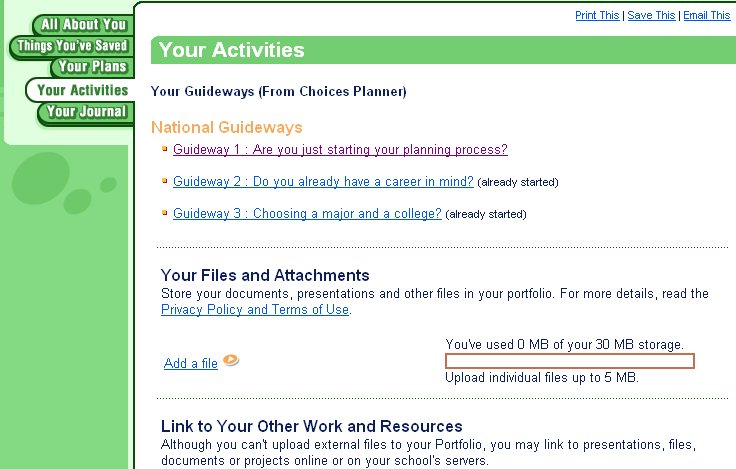
Click on Your Activities Link
Here you will find the section to Add Files or Attachments. Click on “Add a file”.
After the students confirm that their plan has been successfully uploaded into their portfolios and they have printed a hard copy, they can drag the Resume template from the desktop to the recycle bin.
5/31/07 1